Never in my entire life did I have decent bedside tables. You know those two little ones on BOTH sides of the bed that holds the cute lamps and knick-knacks. I've had a bookcase/ a desk/ a vanity beside my bed, but never a side table. Now with an upgrade to a bigger room, I need to have those!
But of course the cheap-o in me don't want to spend, so I look around the house to find something I can work with.
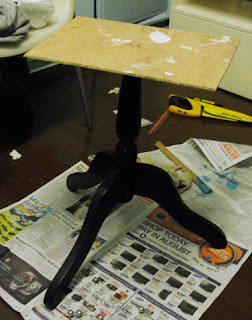
Enter Dress Form Base.
The dress form got ruined by the flood last year. Thank goodness they kept the base. I love the shape, I knew this got to be the foot of my table. I would love to have a chunky round top, but do I really expect to find that lying around the house?
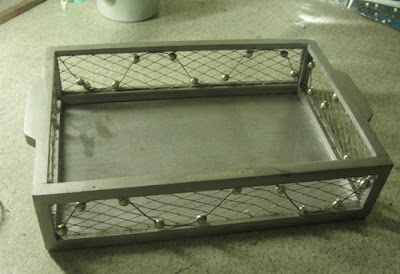
Enter Marks & Spencer Gift Tray.
I've got this tray for years, just doing its usual purpose of keeping some things in order. But it's just the right size for the base, and hey, I don't need to build anything from scratch.
WHAT I DID:
1. removed the balls from the tray
2. cut the steel pole from the dress form base
I don't want to nail through the tray to avoid ugly holes, so I..
3. cut a thin plywood sized to the inside measurements of the tray and
4. secured the plywood to the base
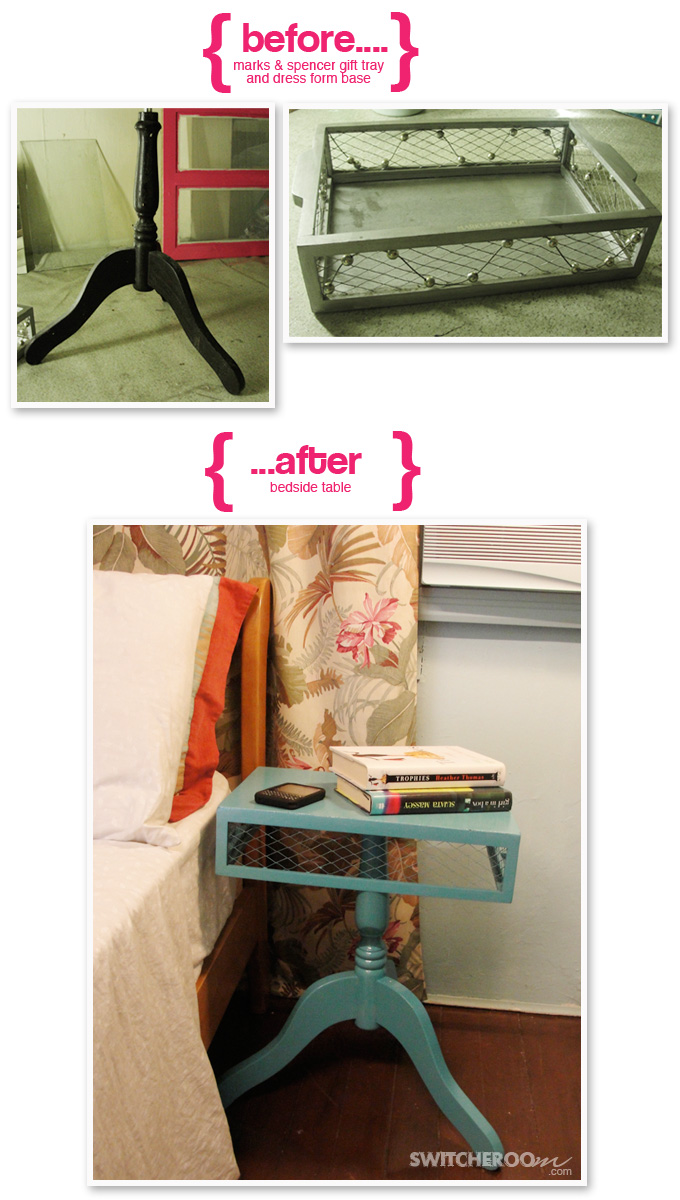
5. placed the tray upside down, and fixed with nail glue.
6. painted
I'm so pleased with the outcome! Now I just need to find the cute lamp to place on it.
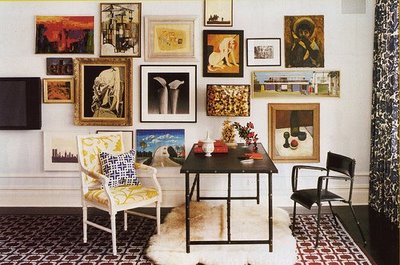
{what I got} Don't be afraid to mix styles and textures, being too matchy doesn't give as much depth and character to a space. And pops of yellow brings fun and lightness to an otherwise streamlined and sophisticated room.
*got this from my inspiration folder, no idea where this image came from. If you know the source, let me know!
*got this from my inspiration folder, no idea where this image came from. If you know the source, let me know!
frame gallery
Too many frames, too many options: Ways to showcase a frame gallery in your home
11/22/2010 11:52:00 PM
I've always love the look of frames overload on a wall. It's one sure way to give life to any room. You bet I'll be putting that up in more than one room for this 'house prettify' project I've been working on.
Relying on my trusted friend for inspiration (google, who else?), I found tons of different options for displaying frames and it's darn hard to choose.
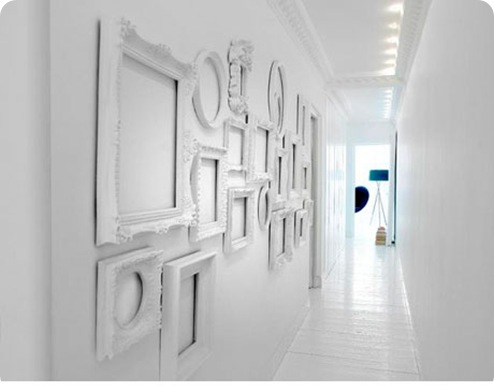
4. Frame color = Wall color
This is a fresh look that makes your artwork/photo stands out. It can also add texture to a blank wall without creating too much visual clutter. Perfect for those half-minimalist-half-artsy people out there.
and then there's the.....
So now you understand why I use darn. It's too hard to choose from all these styles and techniques! These things requires long pondering/daydreaming, and it doesn't hurt to have the talent.
After much thought (yep, long daydreaming helps), here's my 'wall' plan for our house:
My bedroom- frames: mismatched / arrangement: complete symmetry-the box (update! see my bedroom gallery here)
Hallway- frames: matchy-matchy / arrangement: sort-of-symmetrical (update! hallway TINY gallery here)
Living room- frames: mismatched / arrangement: random (update! our living room frame gallery here)
Photos of our wall galleries to follow upon completion of projects. (fingers crossed so tight it hurts)
Image credit (from top to bottom): Jonathan Adler, La Maison, Domino, Kids Collective, John Derian, Chic Home Decor, Steven Gambrel, O at home, Living Etc, Mr Kate, House and Garden, Source unknown, Pottery Barn, Interior Design, Dec0r, Posy
Relying on my trusted friend for inspiration (google, who else?), I found tons of different options for displaying frames and it's darn hard to choose.
{FRAMES}
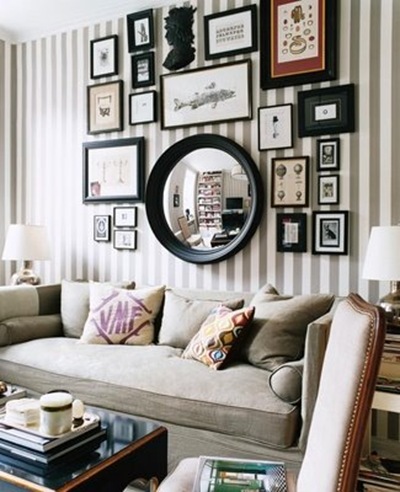
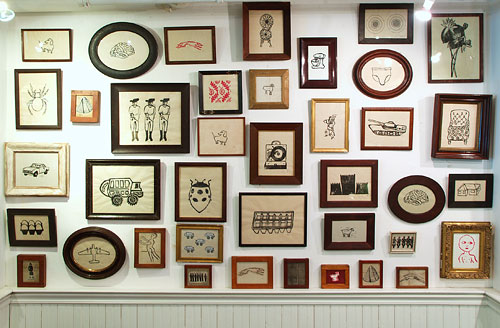
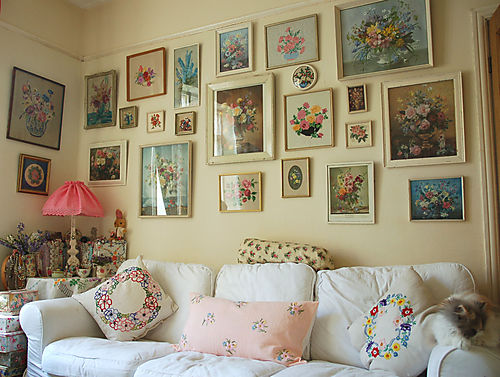
1. Mismatched
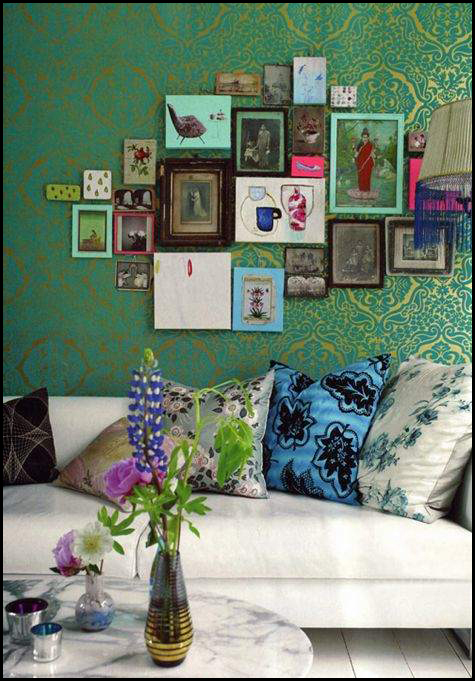
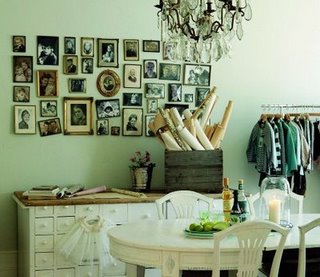
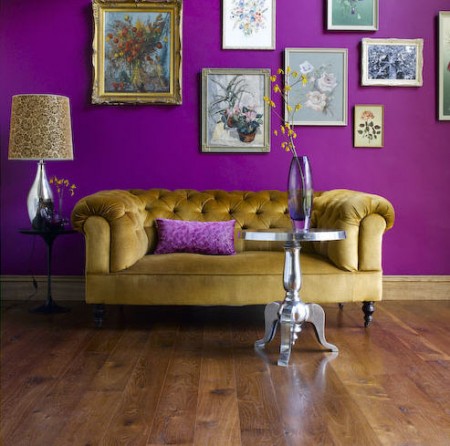
If you want an eclectic feel with a collected-over-time look, its the way to go. It seems relaxed and effortless (though I'm pretty sure putting up a wall like these takes a LOT of effort) ;)
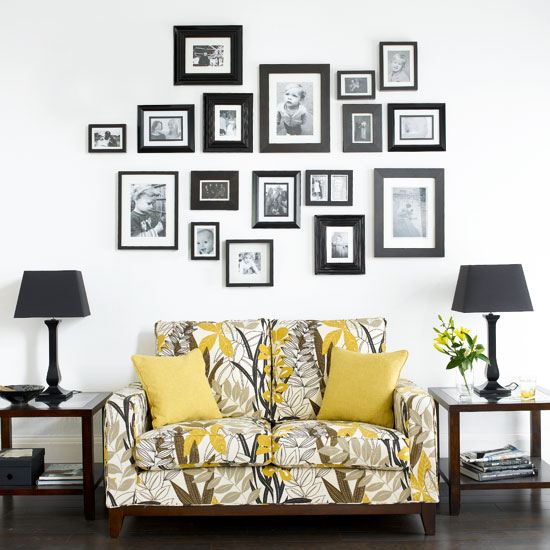
2. Matchy-matchy
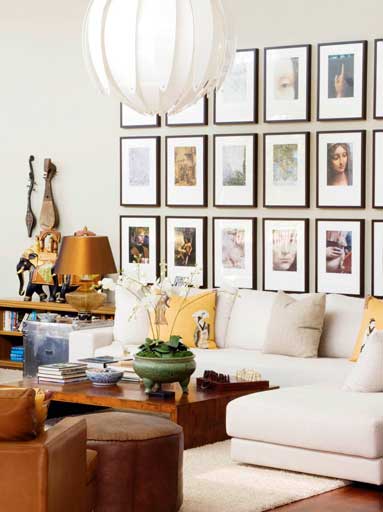
Feeling formal and a bit traditional? Have your frames in one solid color.
3. Monochromatic
This is the marriage of mismatched and matchy-matchy. Have mismatched frames in monochromatic shades to achieve a relaxed borderline-formal feel. (confusing I know, but you get my point)4. Frame color = Wall color
This is a fresh look that makes your artwork/photo stands out. It can also add texture to a blank wall without creating too much visual clutter. Perfect for those half-minimalist-half-artsy people out there.
and then there's the.....
{ARRANGEMENT}
1. Sort-of-Symmetrical
The frames are arranged to form a kinda shape so it's sorta symmetrical with a bit of balance but not really. (WHAT??!!)
2. Complete Symmetry-The Box
Now this is not confusing. Arranging the frames formally to form a box / square / rectangle.
3. Random
How about slapping those frames on the wall to form nothing but turns out beautifully nonetheless?So now you understand why I use darn. It's too hard to choose from all these styles and techniques! These things requires long pondering/daydreaming, and it doesn't hurt to have the talent.
After much thought (yep, long daydreaming helps), here's my 'wall' plan for our house:
My bedroom- frames: mismatched / arrangement: complete symmetry-the box (update! see my bedroom gallery here)
Hallway- frames: matchy-matchy / arrangement: sort-of-symmetrical (update! hallway TINY gallery here)
Living room- frames: mismatched / arrangement: random (update! our living room frame gallery here)
Photos of our wall galleries to follow upon completion of projects. (fingers crossed so tight it hurts)
Image credit (from top to bottom): Jonathan Adler, La Maison, Domino, Kids Collective, John Derian, Chic Home Decor, Steven Gambrel, O at home, Living Etc, Mr Kate, House and Garden, Source unknown, Pottery Barn, Interior Design, Dec0r, Posy
One way to get home inspirations is by checking out websites of designers/decorators. (yep, those two are different. There has been quite a stir on those professional titles, but more on that later.) My mind is kinda messed up and I tend to go from one thought to the next. Please bare with me :) Back to the post.
I chance upon Anne Coyle's portfolio at Apartment Therapy (I love AT / tons and tons of inspirations/ I'm doing it again/ sorry) and I love her mix of traditional details with fun decors. I just hope her pictures have better quality :) Here are my favorites.
I chance upon Anne Coyle's portfolio at Apartment Therapy (I love AT / tons and tons of inspirations/ I'm doing it again/ sorry) and I love her mix of traditional details with fun decors. I just hope her pictures have better quality :) Here are my favorites.
WEBSITE: Anne Coyle Interiors
How can having that bold graphic wallpaper still make this room calm and serene?
Everything about this home office is sexy -the chairs, the curvy intricate desk, the bold walls, the hanging dress - everything.
Iwant NEED to see this room at night! I bet it would be even sexier. Okay, I'm stopping now, I'm starting to sound like a maniac. :)
I
Elle Decor
So you went ahead and created your dream room moodboard. You're quite happy with how it turned out and can't wait to start decorating. You went to your favorite store and got lost into the sea of amazing fabrics and furnishings and totally forgot about your idea. Yes I'm describing what happened to me. I have this vision for a room and I kinda screwed it up.
We went to Divisoria (the go-to place here in Manila for affordable fabrics) so I can finally have my hands on the curtain for my new room. I was focused, AT FIRST, to finding the prefect gray fabric, but my crazy head went crazier over different prints that I saw. And the fact that there's not so much gray option didn't help. So I went home with the total opposite of my vision.
Clean plain gray becomes tropical beachy yellowy bluey greeny curtain. I'm actually happy bringing it home. I love how the blue parts picks up the pale teal I want on the wall, and I love the vintage vibe it brings.
I then turned on my computer and viewed the moodboard I made. I realized that this thing wouldn't work with my current vision! And the curtain will be up in 2 big walls! oh no... major oh no.
No more bright yellow vanity (too much yellowish shade). No more black floors(dark wood will just fit better, so instead of painting the wood floors, we'll just stain it). And I'm still not satisfied with the new board. I can totally hear Tim Gunn in my head.. "Make it work!" I wish he was here with me to give me a push, and just because he's too adorable that I won't mind even if I have the ugliest venetian blinds to work with.
Enough of the day dreaming. I have 17 yards of this fabric and I'LL MAKE IT WORK. (all caps for emphasis and just to remind me that I have no choice)
I'm actually liking the print again. Everyday that I look at it, new ideas are coming and I'm excited once again. And this I promise myself --I'm gonna have my dream room with my not-so-right fabric!
But for your sake -if you really love what you envision, STICK WITH YOUR MOODBOARD!
Few lessons I learned the hard way:
UPDATE: I can't make it work. Ha! I'll be replacing them soon. Check them out here.
So again, I repeat, STICK WITH YOUR MOODBOARD!
apartment therapy
We went to Divisoria (the go-to place here in Manila for affordable fabrics) so I can finally have my hands on the curtain for my new room. I was focused, AT FIRST, to finding the prefect gray fabric, but my crazy head went crazier over different prints that I saw. And the fact that there's not so much gray option didn't help. So I went home with the total opposite of my vision.
Clean plain gray becomes tropical beachy yellowy bluey greeny curtain. I'm actually happy bringing it home. I love how the blue parts picks up the pale teal I want on the wall, and I love the vintage vibe it brings.
I then turned on my computer and viewed the moodboard I made. I realized that this thing wouldn't work with my current vision! And the curtain will be up in 2 big walls! oh no... major oh no.
So from this...
to this...
No more bright yellow vanity (too much yellowish shade). No more black floors(dark wood will just fit better, so instead of painting the wood floors, we'll just stain it). And I'm still not satisfied with the new board. I can totally hear Tim Gunn in my head.. "Make it work!" I wish he was here with me to give me a push, and just because he's too adorable that I won't mind even if I have the ugliest venetian blinds to work with.
Enough of the day dreaming. I have 17 yards of this fabric and I'LL MAKE IT WORK. (all caps for emphasis and just to remind me that I have no choice)
I'm actually liking the print again. Everyday that I look at it, new ideas are coming and I'm excited once again. And this I promise myself --I'm gonna have my dream room with my not-so-right fabric!
But for your sake -if you really love what you envision, STICK WITH YOUR MOODBOARD!
Few lessons I learned the hard way:
- Print your board and bring it every time you go shopping for the room.
- Create a list of the things you need to purchase, and stick with it! Be precise with the list.. Sheer white curtains, working desk with clean lines, plain blue sheets, and so on.
- If you can't find "the one", get the "almost" one. The nearest shade, the more similar pattern, the closest feel and look... you get my point.
- If you fell in love with something not in your vision, try to stay back. If it really draws you near, look closely at your board and see if it would work. If not, MOVE ON. or get it and put it in another room :)
UPDATE: I can't make it work. Ha! I'll be replacing them soon. Check them out here.
So again, I repeat, STICK WITH YOUR MOODBOARD!
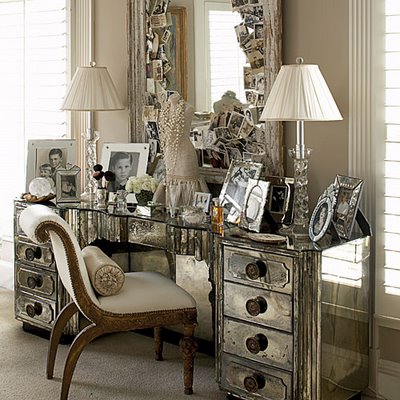
When you see a hollywoodesque, glam, posh, fab, (insert any other high-end adjectives you know) room, there's always a mirrored dresser/vanity somewhere in there.
It gives any room so much drama, and depth. Literally. (light bounces off the surface and you'll see different colors and textures from different angles)
I personally would love one of these. If only I can have have someone constantly rubbing off all the dirt, the fingerprints, and all the mess I'm sure I'll manage to get onto that surface. (dirty mirrored vanity is definitely not hollywoodesque, glam, posh, fab, or any other high-end adjectives you know)
"I love this look a lot but it's way out of my price range!"
How about a little DIY? I found a tutorial that turned an ordinary desk, into this:
See the tutorial here.
These are no doubt lovely pieces, but definitely not for everyone. Can you imagine doing your make-up and having all the loose powder and eyeshadow particles cluttering the surface? And even worse, you see double the mess! (I'm over reacting, I know. But the messy side of me can't get over that thought)
So what's more vain than having mirrors on all sides and being able to see yourself in different angles? What piece of furniture requires constant cleaning, dusting, and windexing? I dubbed this "The Vain Vanity."
(These photos are from my inspiration folder from way before. If you know the source, please let me know. Thanks!)
It's great to work at home, but it's even greater to work at an awesome home office. "HO of the day" will feature all the home offices I want for my selfish self.
Loving how soft and feminine this room is, but still the blues and greens pulls it from being too overly frilly.
And please, can I have that lamp?? It will be perfect for my new room I'm working on.
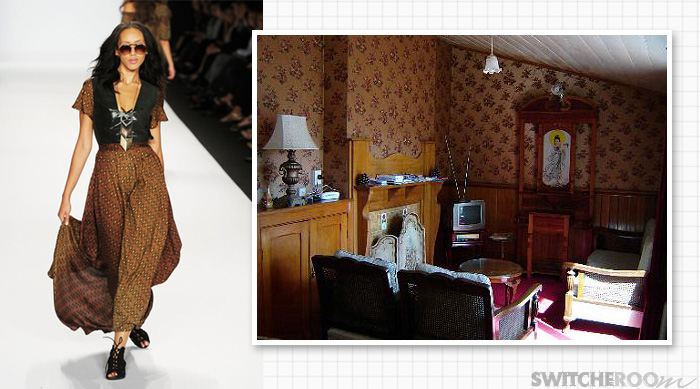
I've watched Project Runway since day one. I've designed clothes before, so the challenges excites me. But lets be real, I just don't watch to see the garments on the runway, I'm in for all the drama. And season 8 is full of it! I particularly enjoyed all the controversies, and the outrage by fans on the finale outcome is astonishing.
Okay, for those who have no idea what I'm talking about, here are some reads that I enjoyed. (REALLY entertaining comment sections)
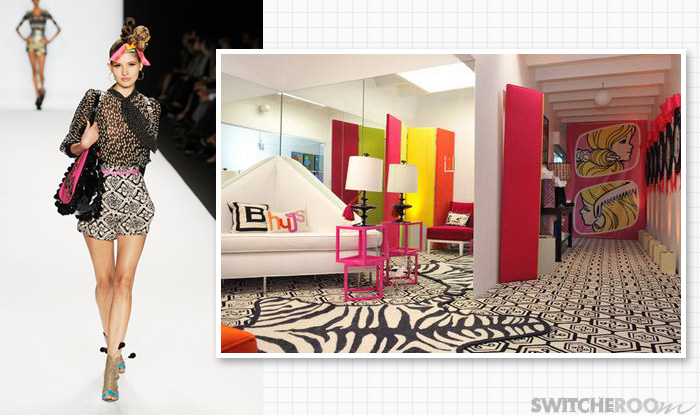
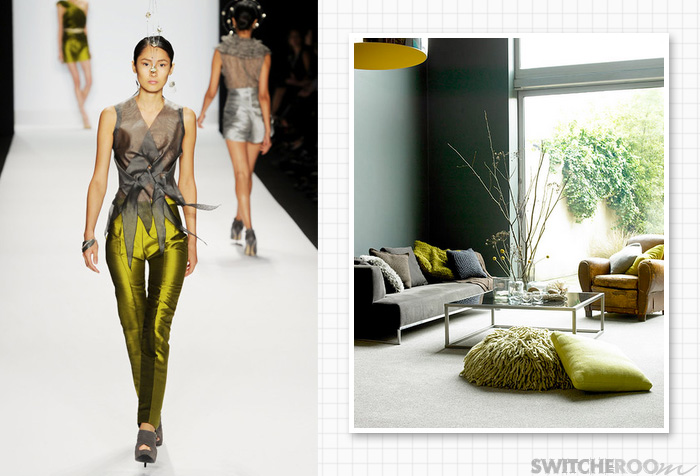
I'm on Team Mondo (obviously), and so are a lot of people. But to be a bit fair to Gretchen, I like some aspects of her collection. Like "her room", her collection has some great details to it. But still, COME ON!! *I am now reminding myself not to rant, there's already plenty out there and they have said it all*
On a side note, I let my boyfriend (who hasn't seen the entire season) watch the finale and ask him who the winner is. He chose Gretchen. With all the pink / the loud prints/ the whole pom pom head pieces of Mondo's, this is one disagreement I'm happy about.
Okay, for those who have no idea what I'm talking about, here are some reads that I enjoyed. (REALLY entertaining comment sections)
- Salt wins over sugar
- Did the judges get it right? Only time will tell.
- Project Runway, Gretchen Fail
ROOM MONDO
ROOM ANDY
ROOM GRETCHEN
Heidi: "Gretchen, congratulations you are the winner!"
People watching: "??????!??!"
I'm on Team Mondo (obviously), and so are a lot of people. But to be a bit fair to Gretchen, I like some aspects of her collection. Like "her room", her collection has some great details to it. But still, COME ON!! *I am now reminding myself not to rant, there's already plenty out there and they have said it all*
On a side note, I let my boyfriend (who hasn't seen the entire season) watch the finale and ask him who the winner is. He chose Gretchen. With all the pink / the loud prints/ the whole pom pom head pieces of Mondo's, this is one disagreement I'm happy about.


